As we work along with the javascript framework (vue / react) we will realize that there are custom components in our application that you might need to re-use in different applications or sometimes we have to share with the community.
Let’s see how to publish our first component into npm and use it in our project.
In my previous post, I explain how to create a vuejs plugin and use it in our project. In this post I am going to use the same project to publish in npm
In the last blog, I explain how to create and use the library/plugin. Lets recap important things to do before publishing into npm
After we build library/plugin files into dist folder, we have to update our package.json
Let us add the main entry point in packge.json file
"main": "./dist/lib.umd.min.js",
Now let’s whitelist what are the files needed when someone is using them inside their node_modules. Here we need to include only dist folder from our project.
"files": [ "dist/*"],
Pushing compiled source code is the right way to publish in NPM. Users usually won’t edit this code. if they want to make changes, they can fork from version control systems (like Github). In case you want to include all files, we add like below
"files": [
  "dist/*",
  "src/*",
  "folder/*",
],
Let’s add additional details like author details and license also into the package.json
version: the version number of our plugin/library. You will have to increment this number every time you publish an update for your package. usually we follow semantic versioning
private : This means your package is public (i.e. everyone is able to see and install it).
license: license for our package
author: author details
main: The primary entry point to our plugin.
files: specifies which files should be published on NPM.
I have been working with Vue for a long time, Sometimes I have to create vue project as a library, and I have to use it in multiple projects, Here I am explaining how to create a small Vue js (vue 2) component library, push to npm and use in our project
we are going to create two Vue.js apps:
A library or package that will contain a basic component
An app that will use the just created library
Prerequisites
I’m going to use npm as the package manager and vueCLI to create and build both our library and app.
Project Setup
I created a blog to set up a Vue js project in my previous article briefly, please refer here. Here I am pasting all the comments I used.
APP setup
Let’s create our app first
vue create vue-app
Then we can cd vue-app and npm run serve to run the server. This will run our server in http://localhost:8080/
Library setup
Let’s create a basic project for the library now
vue create sb-vue-component-library
Then we can cd vue-app and npm run serve to run the server This will run our server in http://localhost:8081/ (since our app is running on 8080)
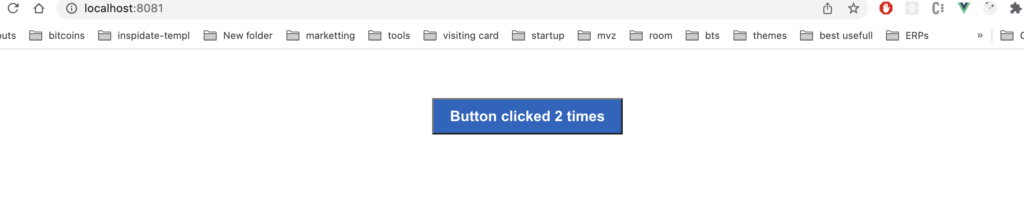
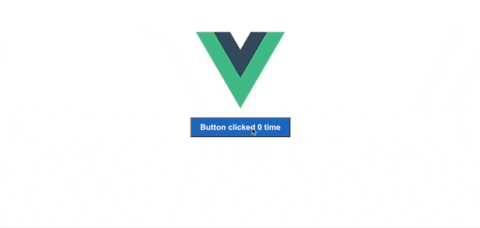
Now let’s create a button component and add functionality
Lets us remove component/Helloworld.vue and create a new file component/Button.vue
We can run the server and it will look like below. Every time you click on the button the text should update.
Library Build
Let’s make a new file lib-setup.js in src
import OurVue from "vue";
import components from "./components";
// import Button from "@/components/Button";

/**
 * install function
 *
 * @param {*} Vue parent component vue contructor
 */
function install(Vue) {
  if (OurVue !== Vue) {
    // eslint-disable-next-line no-console
    console.error("Multiple instances of Vue detected ");
  }

  if (install.installed) return;
  install.installed = true;

  // registering component to use as  plugin
  //   if we need to use a single component only use below line only
  //   Vue.component("my-button", Button);
  for (const prop in components) {
    // eslint-disable-next-line no-prototype-builtins
    if (components.hasOwnProperty(prop)) {
      const component = components[prop];
      Vue.component(component.name, component);
    }
  }
}

const plugin = {
  install,
};

let GlobalVue = null;
if (typeof window !== "undefined") {
  GlobalVue = window.Vue;
} else if (typeof global !== "undefined") {
  GlobalVue = global.vue;
}

if (GlobalVue) {
  GlobalVue.use(plugin);
}

plugin.install = install;

export default plugin;
In the above code, we are saying to register all the components in component/index.js as individual components with defined names in the component file.
If we need only one file to export as a library we can do as below (commented code in above code section)
import myButton from "@/components/myButton";
define the name (here I am giving “my-button” as the name of the component) as below.
Vue.component("my-button", Button);
Update package with a build script
in package.json, we can add one more line to build our library using lib-setup.js the file. So we can add the below line
Let us add Vue 2 in peerDependencies, so npm will warn if the version is not matching
"peerDependencies": {
    "vue": "^2.6.14"
  },
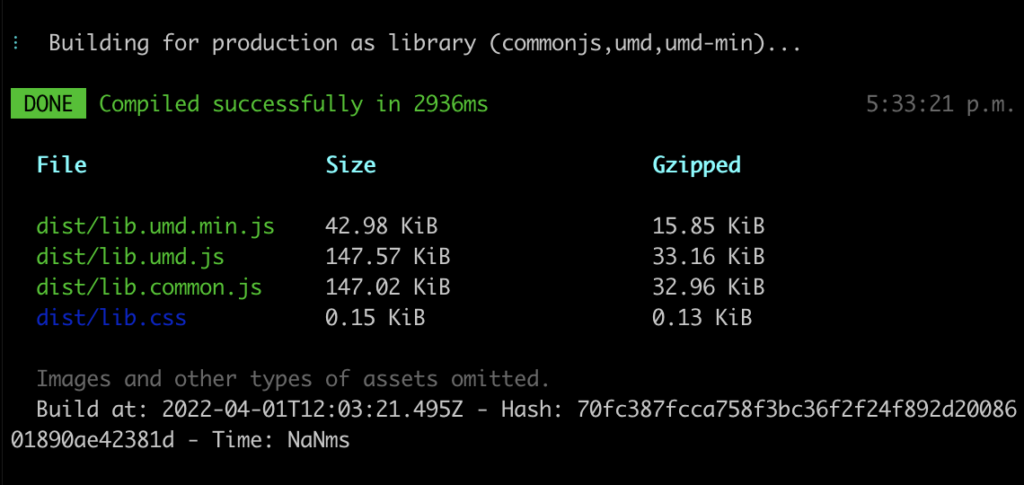
Now let’s build our library, by typing in the comment line
npm run build:lib
The output of the build process will create a folder dist and 4 files inside, let’s see what are those:
dist/lib.umd.js: UMD (Universal Module Definition) bundle can be consumed directly in the browser as a module.
dist/lib.umd.min.js: minified UMD bundle.
dist/lib.common.js:CommonJS bundle which can be consumed by other bundlers, this file will be used as an entry point.
dist/lib.css: CSS file which was extracted from the components.
Now, we want to add the entry point to our library, we will add it to package.json:
"main": "./dist/lib.umd.min.js",
After that, we want to whitelist the files which will be included in our npm package, add this to package.json: (Here we need to add only compiled files in the package)
Now you can use the npm package as a dependency in your other projects.
There are multiple ways to use this library in our project.
1. Using the npm link
We can consume the library locally by configuring the npm link or can just publish it to npm and install it in your project.
npm link
This will create a global symbolic link to the package. Do you remember we created another sample project to use this library, which is running in http://localhost:8080/? Inside that project we can run the below the comment and use it in our vue-app project
npm link sb-vue-component-library
2. Using Github
We can push our code to GitHub and install the plugin directly from Github. To do so,
We have to build our library and commit dist folder.
I removed /dist from .gitignore file and commit all changes to Github.
Now our vue-app project we can install the plugin using the below comment
npm i https://github.com/shabeeb/sb-vue-component-library.git --save
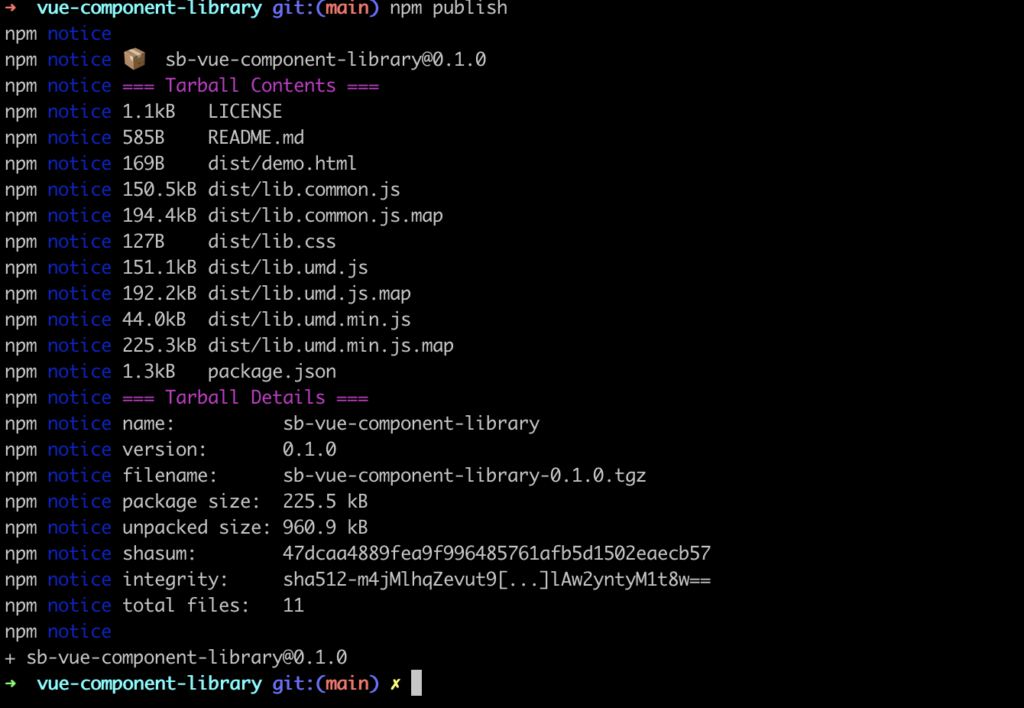
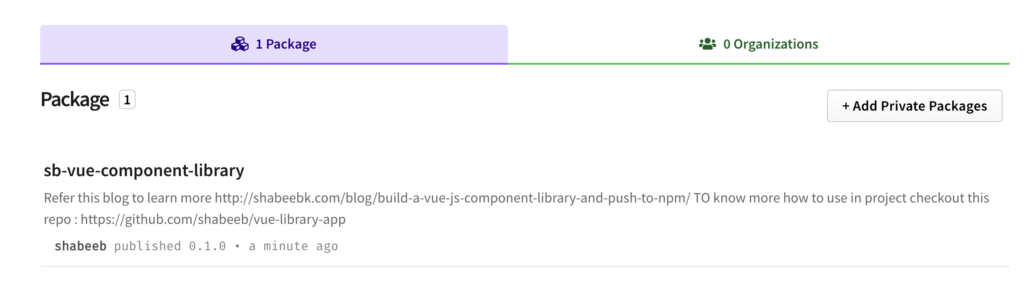
3. publishing to npm
Please refer to part 2 of this blog to publish to npm, here
once it is published, we can use
npm i sb-vue-component-library --save
How to use the library
Now we have our sb-vue-component-library in our package.json and inside our node_modules. Let’s use it
since our folder name is different from the package name (I changed it since the name is not available in npmjs) we use the package name here.
in main.js
import myButton from "sb-vue-component-library";
Let’s import CSS also for styles
import "sb-vue-component-library/dist/lib.css";
and we can use it globally
Vue.use(myButton);
Final main.js code looks like
import Vue from "vue";
import App from "./App.vue";
import myButton from "sb-vue-component-library";
import "sb-vue-component-library/dist/lib.css";

Vue.config.productionTip = false;
Vue.use(myButton);

new Vue({
  render: (h) => h(App),
}).$mount("#app");
Reactjs is one of the powerful library for building user interfaces.
Let’s start with reactjs project.
To start with reactjs I created a react-starter-kit which can be downloaded from github.
In this starter kit, I am using following modules.
Nodejs — Node server
Expressjs — Express framework
Reactjs — React as view layer
React-router — For routing the application
Eslint — For best practices.
Webpack — For bundling
First, we have to clone this repo.
git clone https://github.com/shabeeb/react-starter-kit
once it cloned we have to move to that directory cd react-starter-kit
Then we have to install all depentency modules. dont worry below commands will do it. npm install
Now our sample reactjs project is ready,
We can run development server using below command npm run dev
Now go to the editor and change something in src/components/home.js and see the browser again, react-hot-loader will reload the page.
To run production build npm run build
it will minify all the js/jsx code and save to build/bundle.js file npm start or npm run start
will start server with production version.
You can remove the strict code check (best practices ) by removing below lines (line 25 to 30) of code from webpack.config.js {
enforce: "pre",
test: /\.js$/,
exclude: /node_modules/,
loader: "eslint-loader",
},