As we work along with the javascript framework (vue / react) we will realize that there are custom components in our application that you might need to re-use in different applications or sometimes we have to share with the community.
Let’s see how to publish our first component into npm and use it in our project.
In my previous post, I explain how to create a vuejs plugin and use it in our project. In this post I am going to use the same project to publish in npm
In the last blog, I explain how to create and use the library/plugin. Lets recap important things to do before publishing into npm
After we build library/plugin files into dist folder, we have to update our package.json
Let us add the main entry point in packge.json file
"main": "./dist/lib.umd.min.js",
Now let’s whitelist what are the files needed when someone is using them inside their node_modules. Here we need to include only dist folder from our project.
"files": [ "dist/*"],
Pushing compiled source code is the right way to publish in NPM. Users usually won’t edit this code. if they want to make changes, they can fork from version control systems (like Github). In case you want to include all files, we add like below
"files": [
  "dist/*",
  "src/*",
  "folder/*",
],
Let’s add additional details like author details and license also into the package.json
version: the version number of our plugin/library. You will have to increment this number every time you publish an update for your package. usually we follow semantic versioning
private : This means your package is public (i.e. everyone is able to see and install it).
license: license for our package
author: author details
main: The primary entry point to our plugin.
files: specifies which files should be published on NPM.
I have been working with Vue for a long time, Sometimes I have to create vue project as a library, and I have to use it in multiple projects, Here I am explaining how to create a small Vue js (vue 2) component library, push to npm and use in our project
we are going to create two Vue.js apps:
A library or package that will contain a basic component
An app that will use the just created library
Prerequisites
I’m going to use npm as the package manager and vueCLI to create and build both our library and app.
Project Setup
I created a blog to set up a Vue js project in my previous article briefly, please refer here. Here I am pasting all the comments I used.
APP setup
Let’s create our app first
vue create vue-app
Then we can cd vue-app and npm run serve to run the server. This will run our server in http://localhost:8080/
Library setup
Let’s create a basic project for the library now
vue create sb-vue-component-library
Then we can cd vue-app and npm run serve to run the server This will run our server in http://localhost:8081/ (since our app is running on 8080)
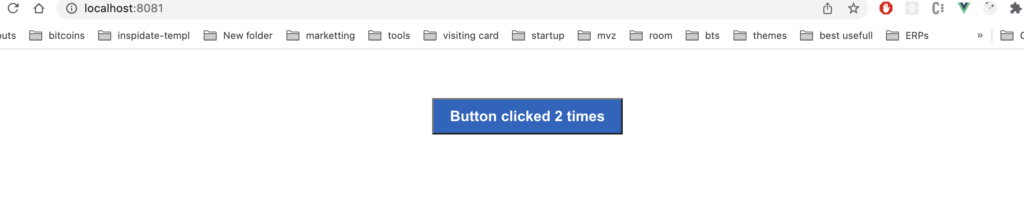
Now let’s create a button component and add functionality
Lets us remove component/Helloworld.vue and create a new file component/Button.vue
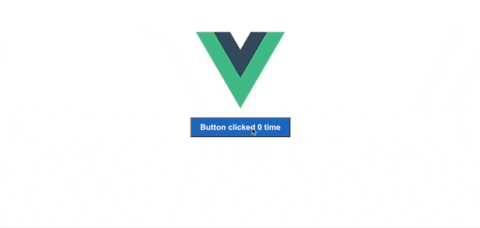
We can run the server and it will look like below. Every time you click on the button the text should update.
Library Build
Let’s make a new file lib-setup.js in src
import OurVue from "vue";
import components from "./components";
// import Button from "@/components/Button";

/**
 * install function
 *
 * @param {*} Vue parent component vue contructor
 */
function install(Vue) {
  if (OurVue !== Vue) {
    // eslint-disable-next-line no-console
    console.error("Multiple instances of Vue detected ");
  }

  if (install.installed) return;
  install.installed = true;

  // registering component to use as  plugin
  //   if we need to use a single component only use below line only
  //   Vue.component("my-button", Button);
  for (const prop in components) {
    // eslint-disable-next-line no-prototype-builtins
    if (components.hasOwnProperty(prop)) {
      const component = components[prop];
      Vue.component(component.name, component);
    }
  }
}

const plugin = {
  install,
};

let GlobalVue = null;
if (typeof window !== "undefined") {
  GlobalVue = window.Vue;
} else if (typeof global !== "undefined") {
  GlobalVue = global.vue;
}

if (GlobalVue) {
  GlobalVue.use(plugin);
}

plugin.install = install;

export default plugin;
In the above code, we are saying to register all the components in component/index.js as individual components with defined names in the component file.
If we need only one file to export as a library we can do as below (commented code in above code section)
import myButton from "@/components/myButton";
define the name (here I am giving “my-button” as the name of the component) as below.
Vue.component("my-button", Button);
Update package with a build script
in package.json, we can add one more line to build our library using lib-setup.js the file. So we can add the below line
Let us add Vue 2 in peerDependencies, so npm will warn if the version is not matching
"peerDependencies": {
    "vue": "^2.6.14"
  },
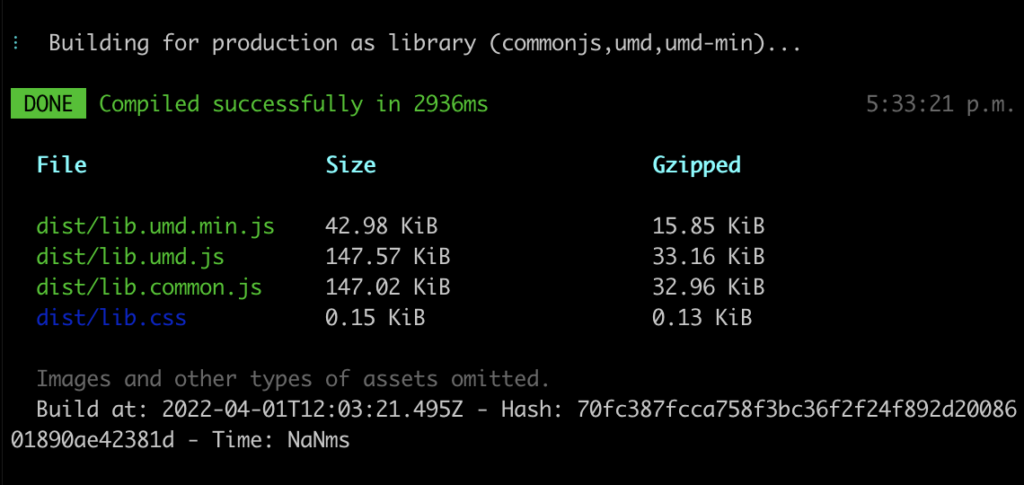
Now let’s build our library, by typing in the comment line
npm run build:lib
The output of the build process will create a folder dist and 4 files inside, let’s see what are those:
dist/lib.umd.js: UMD (Universal Module Definition) bundle can be consumed directly in the browser as a module.
dist/lib.umd.min.js: minified UMD bundle.
dist/lib.common.js:CommonJS bundle which can be consumed by other bundlers, this file will be used as an entry point.
dist/lib.css: CSS file which was extracted from the components.
Now, we want to add the entry point to our library, we will add it to package.json:
"main": "./dist/lib.umd.min.js",
After that, we want to whitelist the files which will be included in our npm package, add this to package.json: (Here we need to add only compiled files in the package)
Now you can use the npm package as a dependency in your other projects.
There are multiple ways to use this library in our project.
1. Using the npm link
We can consume the library locally by configuring the npm link or can just publish it to npm and install it in your project.
npm link
This will create a global symbolic link to the package. Do you remember we created another sample project to use this library, which is running in http://localhost:8080/? Inside that project we can run the below the comment and use it in our vue-app project
npm link sb-vue-component-library
2. Using Github
We can push our code to GitHub and install the plugin directly from Github. To do so,
We have to build our library and commit dist folder.
I removed /dist from .gitignore file and commit all changes to Github.
Now our vue-app project we can install the plugin using the below comment
npm i https://github.com/shabeeb/sb-vue-component-library.git --save
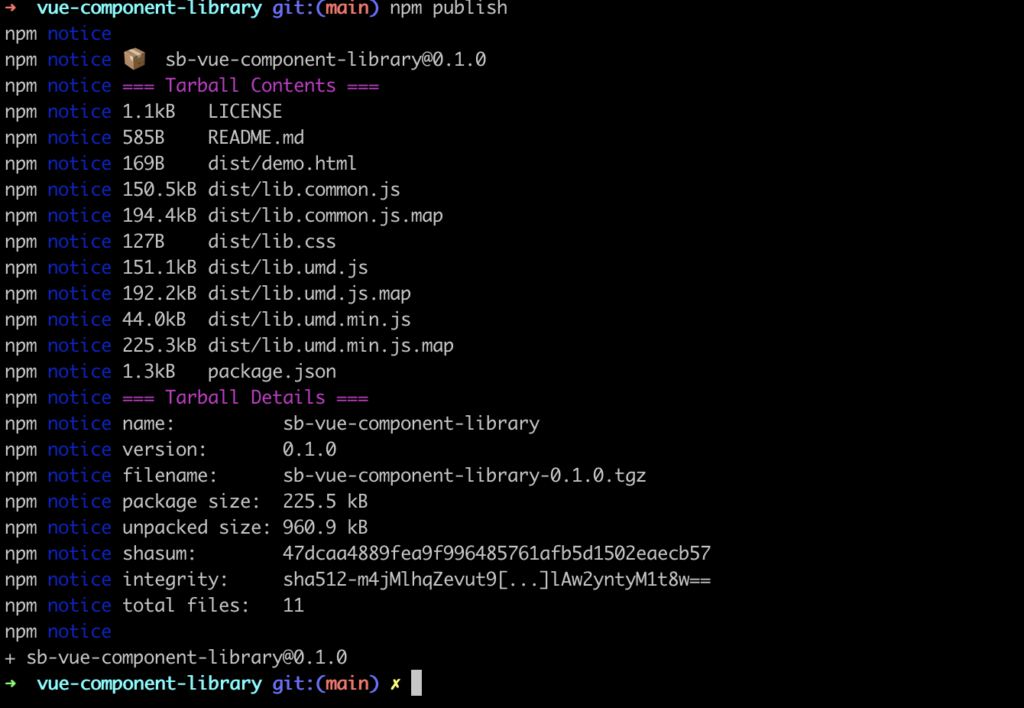
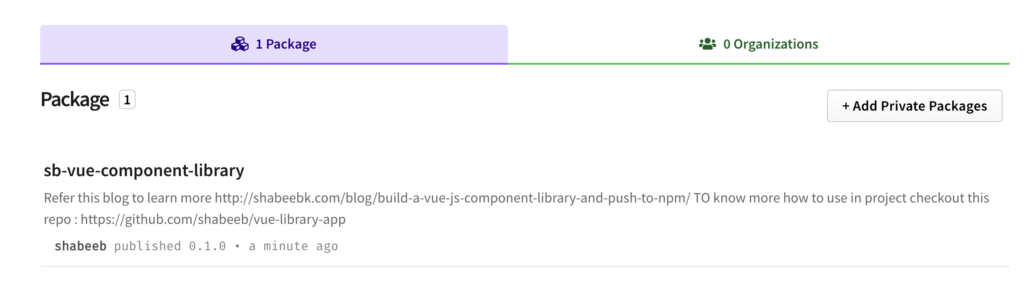
3. publishing to npm
Please refer to part 2 of this blog to publish to npm, here
once it is published, we can use
npm i sb-vue-component-library --save
How to use the library
Now we have our sb-vue-component-library in our package.json and inside our node_modules. Let’s use it
since our folder name is different from the package name (I changed it since the name is not available in npmjs) we use the package name here.
in main.js
import myButton from "sb-vue-component-library";
Let’s import CSS also for styles
import "sb-vue-component-library/dist/lib.css";
and we can use it globally
Vue.use(myButton);
Final main.js code looks like
import Vue from "vue";
import App from "./App.vue";
import myButton from "sb-vue-component-library";
import "sb-vue-component-library/dist/lib.css";

Vue.config.productionTip = false;
Vue.use(myButton);

new Vue({
  render: (h) => h(App),
}).$mount("#app");
When Vue 3 was released one of the most exciting features are CompositionAPI. An alternative to Options API. In this article, let’s take a look at how we can use CompositionAPIin our project
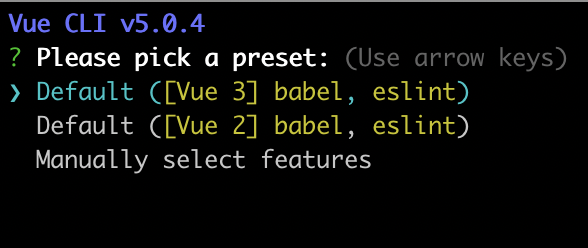
Now let’s start by installing Vue CLI globally. If you already have the CLI, make sure your running at least (I am using Vue CLI v5.0.4)
npm install -g vue-cli
We’ll use the Vue CLI to build a simple application( I am using vue3-composition-todo as project name here )
vue create vue3-composition-todo
Here I am selecting default Vue 3
After installation move into the folder and as shown above cd vue3-composition-todo and start-server npm run serve . This will start a development server and we can see it on http://localhost:8080/
Install plugins
Let us install Bootstrap for styles in our project
npm install bootstrap --save
lets import in bootstrap CSS in App.vue (We are using only Bootstrap CSS)
import 'bootstrap/dist/css/bootstrap.css'
Final code in main.js looks like below
import { createApp } from 'vue'
import App from './App.vue'
import 'bootstrap/dist/css/bootstrap.css'

createApp(App).mount('#app')
Create UI for TODO
First let’s create a file inside the component TodoList.vue
Inside template, we can do small HTML to show todo list
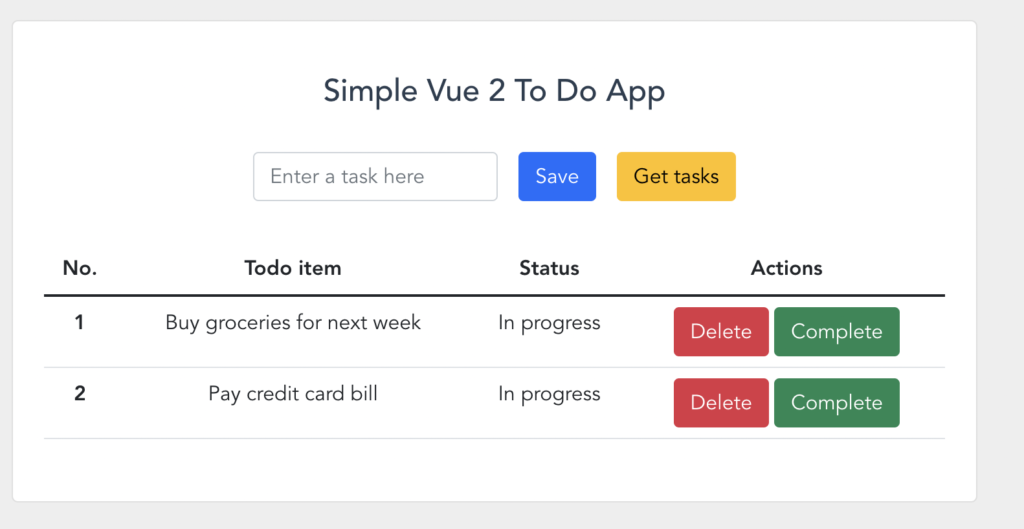
We have a save function now, after typing on click of saving we call addToDo and push data into our todos object. and the table will re-render and show a new to-do items.
The same way we can add more functionality like removeItem (delete a todo item on click of delete button), toggleCompleted (toggle as completed and in progress) and addTodoForme (adding sample data )
import { reactive } from "vue";
function useTodoList() {
  let state = reactive({
    newTodo: "",
    todos: [
      {
        id: 1,
        title: "Buy groceries for next week",
        completed: false,
      },
      {
        id: 2,
        title: "Pay credit card bill ",
        completed: false,
      },
    ],
  });

  function addToDo(e) {
    e.preventDefault();
    state.todos.push({
      id: state.todos.length + 1,
      title: state.newTodo,
      completed: false,
    });
    state.newTodo = "";
  }

  function toggleCompleted(item) {
    item.completed = !item.completed;
  }
  function removeItem(item) {
    state.todos = state.todos.filter((newItem) => newItem.id !== item.id);
  }
  function addTodoForme(e) {
    e.preventDefault();
    const text = `New to do list item with id ${state.todos.length + 1}`;
    state.todos.push({
      id: state.todos.length + 1,
      title: text,
      completed: false,
    });
  }
  return {
    state,
    addToDo,
    toggleCompleted,
    removeItem,
    addTodoForme,
  };
}

export default useTodoList;
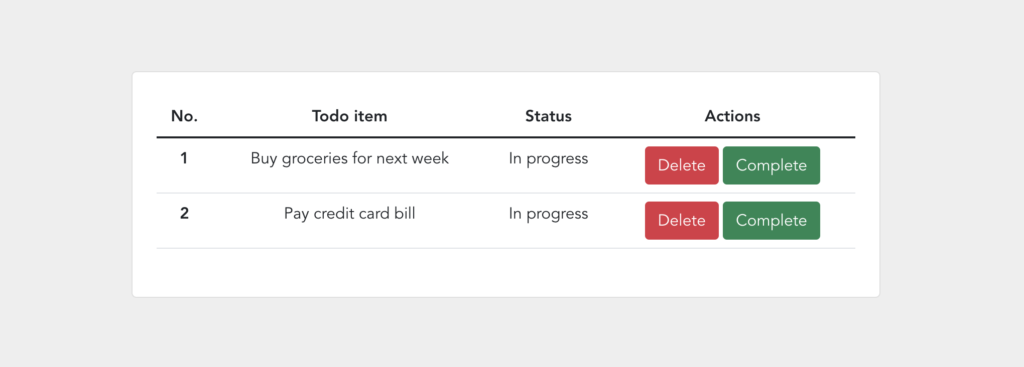
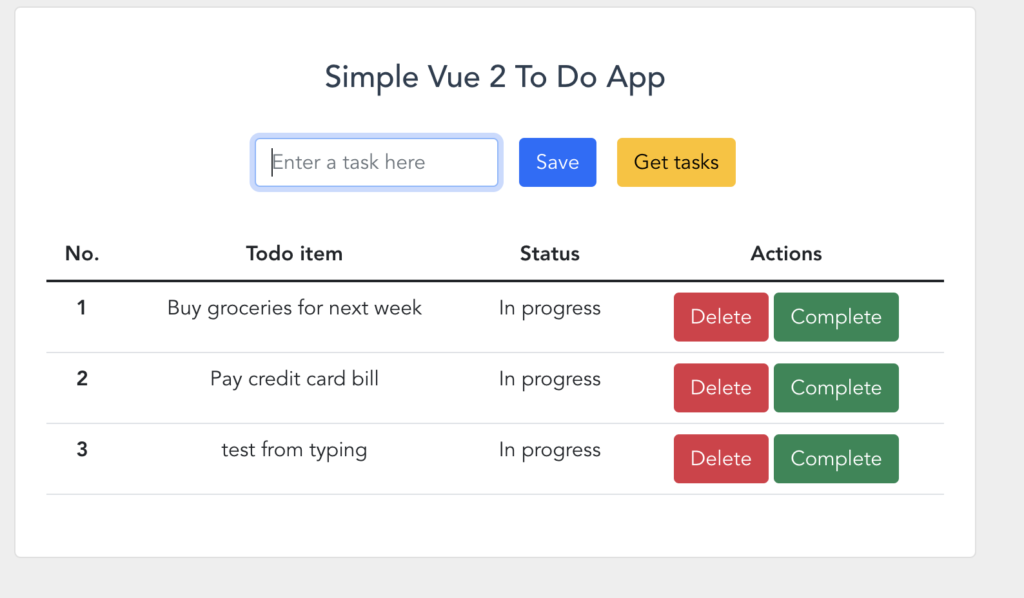
And final output
Conclusion
Finally, we’ve built our app with Vue 3 Composition API. I hope you learned a few things about Vue 3 and Composition API, Let me know if you have any comments
You can download the full source code from my GitHub repo
In this, I’ll show you how to vue2 composition API.
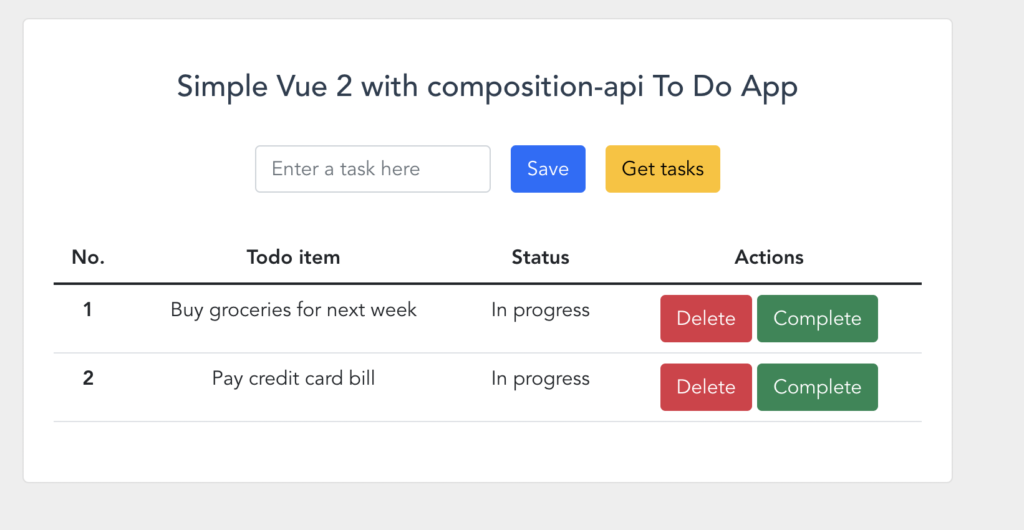
Let us do a small example todo app with Vue composition API Vue 3 come up with Composition API, in Vue 2, we use The Options API, where we use uses options like data, methods, and mounted. With the Composition API, we have a setup hook in which we write our reactive code and functions. We can re-use the same functions in between components using Composition API, and save a lot of time.
We can install vueCLI and create a new project using vue create vue-composition-api-simple-todo. Please refer to my previous post in case you missed it. Once we create our Vue project open the code base and let’s start with installing @vue/composition-api
Install dependencies
npm i @vue/composition-api --save
Let us take the same HTML from my last past, simple vue todo app Here you can read it if you miss
Let us import @vue/composition-api and use it main.js
import CompositionApi from '@vue/composition-api'
Vue.use(CompositionApi)
Start with coding
Full code of main.js looks like below
import Vue from 'vue'
import App from './App.vue'
import CompositionApi from '@vue/composition-api'

Vue.config.productionTip = false
Vue.use(CompositionApi)

new Vue({
  render: h => h(App),
}).$mount('#app')
Let us create a new folder for composable functions
We can define Todos list in composable function like below
import { reactive } from "@vue/composition-api";
function useTodoList() {
  let state = reactive({
    newTodo: "",
    todos: [
      {
        id: 1,
        title: "Buy groceries for next week",
        completed: false,
      },
      {
        id: 2,
        title: "Pay credit card bill ",
        completed: false,
      },
    ],
  });

  return {
    state,
  };
}

export default useTodoList
We use the same date, in composition functions, we will define state using Reactivity API, e.g. ref() and reactive(), that allows us to directly create reactive state, computed state, and watchers. In this example, we use reactive to define the state and now we can use todos inside out template.
in components/TodoList.vue we can import composable function
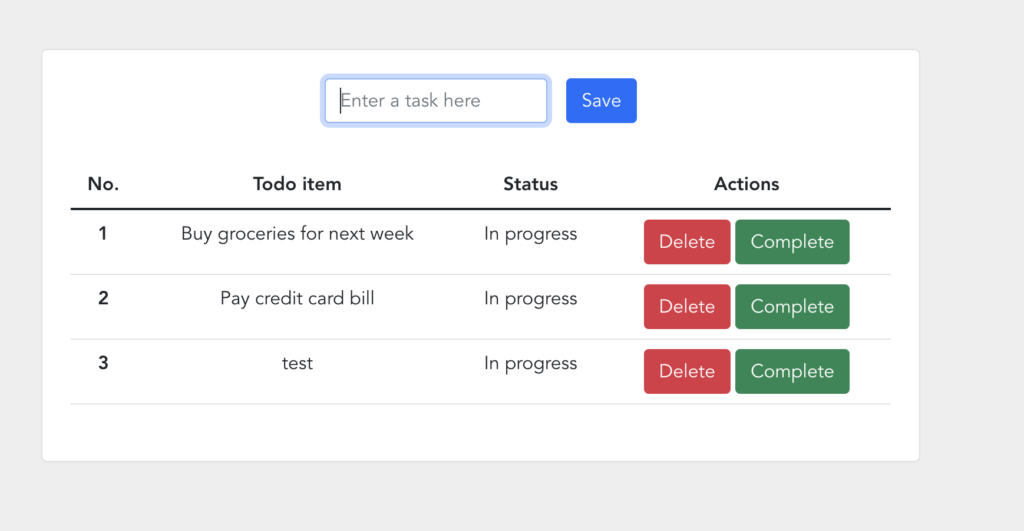
Let’s make a simple vue project example with a TODO list
Setup and Installation
There are two ways to set up Vue: through a VueCLI, or by including a script inside of your HTML file. Let’s do with VueCLI, We can install vue vueCLI globally
npm install -g @vue/cli or yarn global add @vue/cli
Once install complete, let’s create a project by using the below comment
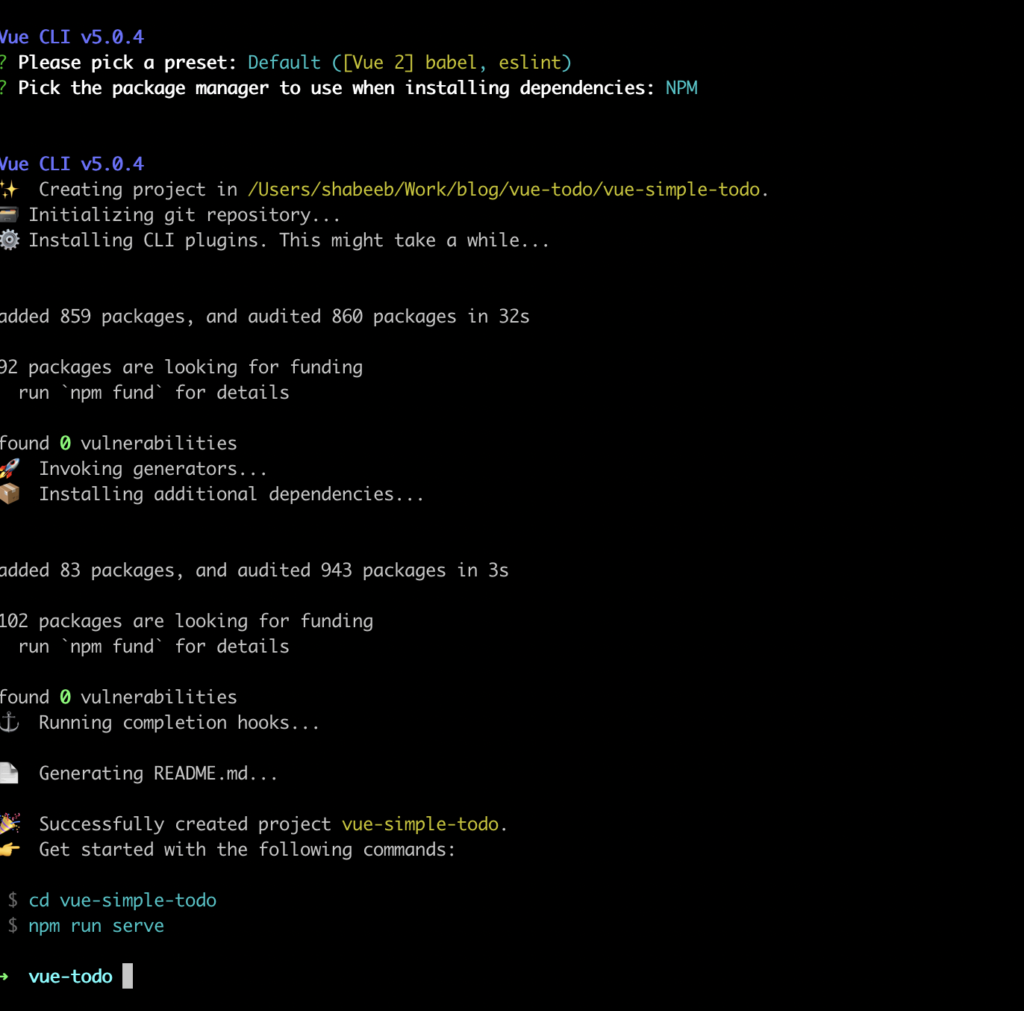
vue create vue-simple-todo
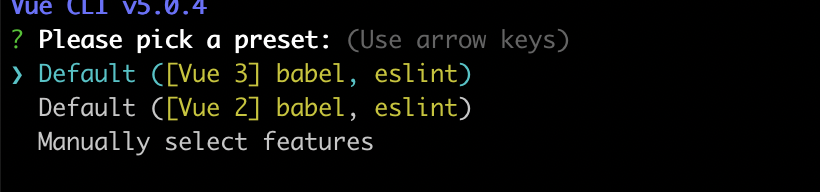
Lets select Vue 2 for this example
Lets select Vue 2 for this example and click enter
Then it will ask for package manager ( Here i am going with npm in this case)
Here is my final screenshot after completing project stup
Now as mentioned there we can cd into folder and start server
npm run serve
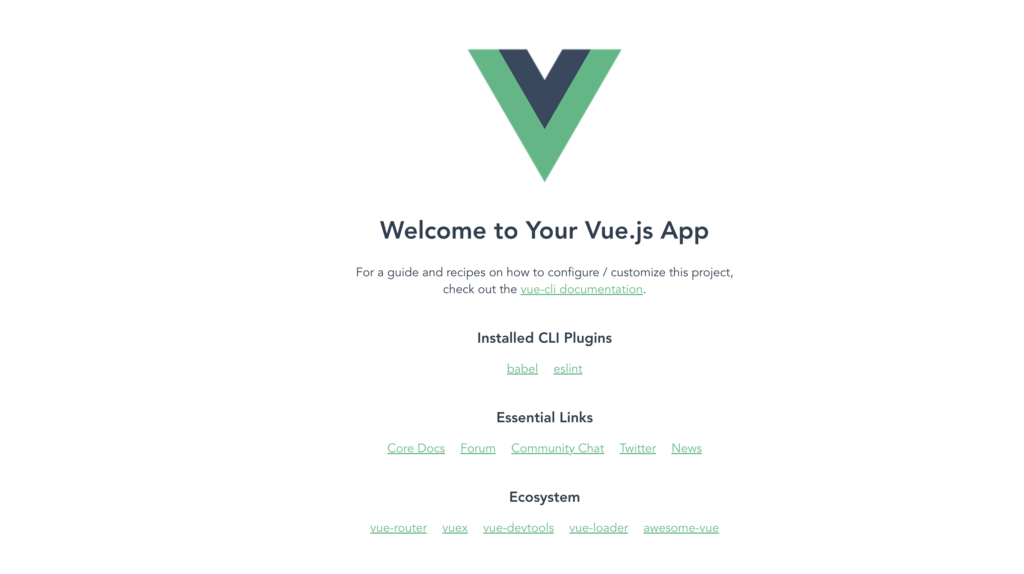
Now server will run on http://localhost:8080/. We can open a browser and see basic vue template in browser
deafault vue page
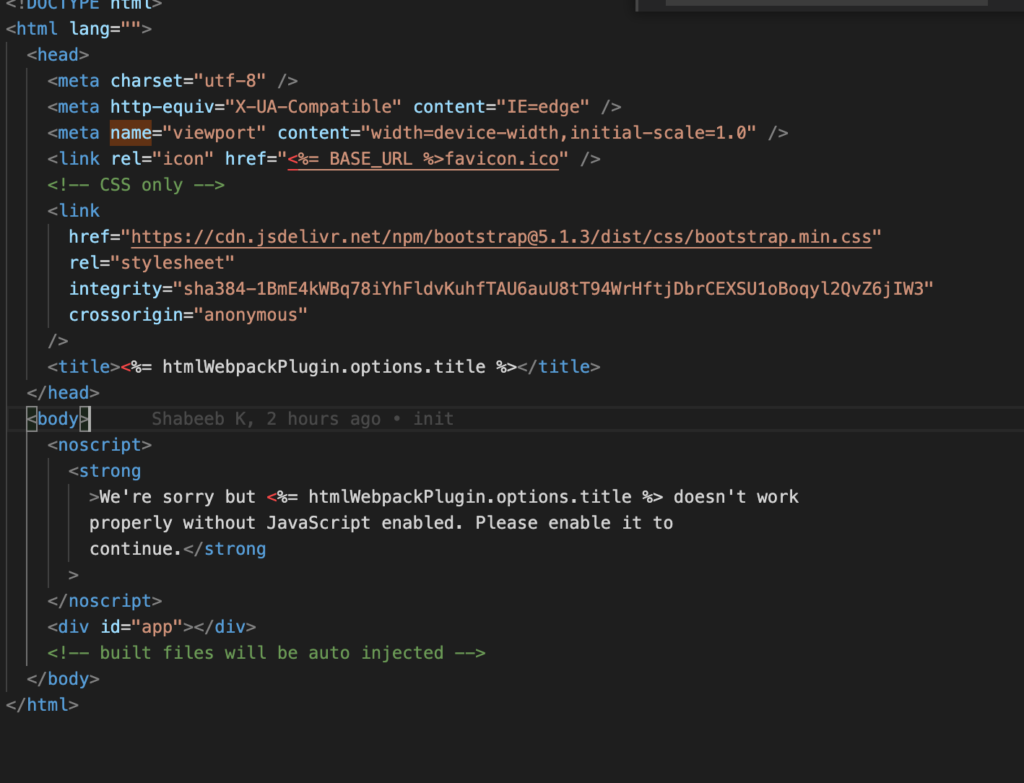
Now let’s take a look on codebase (I am using VS Code for editing files)
We can see App.vue and components folder below
Let’s start our coding 🙂
Let’s start with some cleanup, remove HelloWorld.vue from components, and create a new file TodoList.vue
Now We can define data inside vue class, and move HTML labels from template to todos variable inside data. Here we define our todo list variable and assign some values.
Let’s add the click functionality for the save button, We can add methods below data() add functionality as below. Finally, we will clear newTodo once we added to the current list. On the template, we call this method on the save button as below
Reactjs is one of the powerful library for building user interfaces.
Let’s start with reactjs project.
To start with reactjs I created a react-starter-kit which can be downloaded from github.
In this starter kit, I am using following modules.
Nodejs — Node server
Expressjs — Express framework
Reactjs — React as view layer
React-router — For routing the application
Eslint — For best practices.
Webpack — For bundling
First, we have to clone this repo.
git clone https://github.com/shabeeb/react-starter-kit
once it cloned we have to move to that directory cd react-starter-kit
Then we have to install all depentency modules. dont worry below commands will do it. npm install
Now our sample reactjs project is ready,
We can run development server using below command npm run dev
Now go to the editor and change something in src/components/home.js and see the browser again, react-hot-loader will reload the page.
To run production build npm run build
it will minify all the js/jsx code and save to build/bundle.js file npm start or npm run start
will start server with production version.
You can remove the strict code check (best practices ) by removing below lines (line 25 to 30) of code from webpack.config.js {
enforce: "pre",
test: /\.js$/,
exclude: /node_modules/,
loader: "eslint-loader",
},
git clone url-to-git

example URL :user@domain.com:/home-path/username/directory/
Git status
it will show the files status – modified, tracking , untracked
git status
Git Add for tracking
git add filename
or
git add .
dot is using to add all files
Git commit
git commit -m "commit message"
If the file is under git track we can combine both comments in one line like
git commit -am "your-message"
or
git  commit -a -m "your-message"

-a to add
-m to commit message
Push your changes to server
git push

or
git push branch
Creating branch in git
git branch branch-name
Switch to branch
git checkout branch-name
Create a new branch and switch to new branch
git checkout -b branch name
List all the branches
git branch -a
Merge Branch
Consider we have master branch A and another branch B,
To merge branch B changes to branch A,
git checkout branch A
git merge branch B
if any conflict happened, it will show conflict, we have to do modification and commit again.
Delete a branch
git branch -d <brach name>
this will delete if all the changes are merged, if you want to use force delete , even not merged,
git branch -D <branch name>
Upload branch into server at setting head for push
git push --set-upstream origin <branch name>
Stash all local changes
git stash
Take back stashed changes – This will take aback all the changes you stashed
git stash pop
Discard changes on one file
git checkout filename
Remove local commit and reset to server head – it will delete all the local changes
git reset --hard origin/branch name
List all the branches push/pull remote origin.
This will show all the remote and local branches and where it is pointing into
git remote show origin
Fetch and push origin list
git remote -v
View uncommitted changes made
git diff
To see all the logs
git log
To see log with difference
git log -p
Git log for a single file
git log -p file/path
-p will give changes also
Other options with git log
 git log --stat    //this will show only number of files changed and number of changes
git log --pretty=oneline    //show all the changes in one line with head and comment
git log --pretty=format:"%h - %an, %ar : %s"   //show with name time and commit message

git log --author=username  //show only one user commit
lazy-scroll is an angularjs directive for infinite scrolling. Instead of click pagination links or going to next page , this will help to load data on scrolling like you see in Facebook. lazy-scroll will work even without jquery .
What you have to do to implement on angularjs project?
lazy-scroll is a simple directive for angularjs application. We just have to call the function which you want to call for pagination in lazy-scroll attribute.
It will magically load data and append into variable when user reaches bottom of the page. There are also API’s available to control the behavior.
promises and call back are only doing similar job, but sometimes we have to think whether to have a callback function or promises.
Here we will be discussing about promises and call back function. So let have look on both callback function and promises and how it works.
Call back function
Callback functions are functions that are executed after completing one function.
For example, if we have to do something after getting the result from the server, then we can write a call back function and it will execute once it gets the result from the server.
Let us have a look on the below example:
function first(arg1, callback){
//do some code
//after that call back funtion will be callled
if(type of callback ==function )
callback(options);

}
promises
Promise is just a way of writing asynchronous code in a more synchronous fashion.
ie, When you call promises, it will return a promise value and the calling code will wait until the promise is full filled, before executing next.
angularjs promises example:
var promise = asyncGreet('Robin Hood');
promise.then(function(greeting) {
alert('Success: ' + greeting);
}, function(reason) {
alert('Failed: ' + reason);
});
 //then(successCallback, errorCallback, notifyCallback)

We can pass three parameters for ".then" function, of which one is on success,
another one on failure and last one is notifyCallback .notifyCallback can be
called more than one time to the show progress and it is an optional parameter.
Some differences between call back promises
Call back can be called once or more than once (depends on how it is written).
Promises will be called only once
Call back can throw errors and exceptions (have to write more call back for errors)