When Vue 3 was released one of the most exciting features are Composition API . An alternative to Options API. In this article, let’s take a look at how we can use Composition API in our project
Full source code available in GitHub repo
Demo link: https://vue3-composition-api.pages.dev/
Vue 3 Setup
Now let’s start by installing Vue CLI globally. If you already have the CLI, make sure your running at least (I am using Vue CLI v5.0.4)
npm install -g vue-cliWe’ll use the Vue CLI to build a simple application( I am using vue3-composition-todo as project name here )
vue create vue3-composition-todo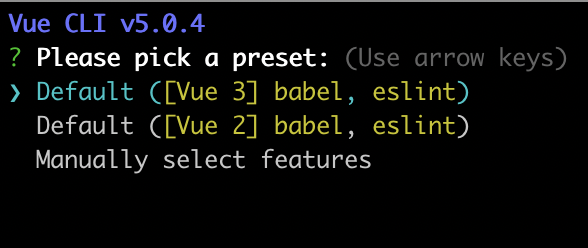
Here I am selecting default Vue 3

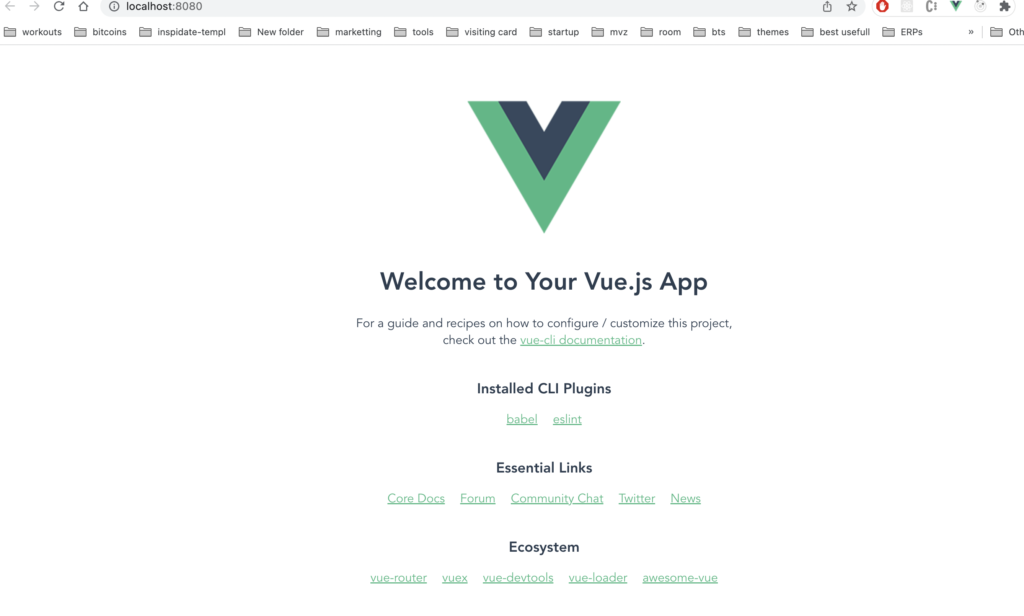
After installation move into the folder and as shown above cd vue3-composition-todo and start-server npm run serve . This will start a development server and we can see it on http://localhost:8080/
Install plugins
Let us install Bootstrap for styles in our project
npm install bootstrap --savelets import in bootstrap CSS in App.vue (We are using only Bootstrap CSS)
import 'bootstrap/dist/css/bootstrap.css'Final code in main.js looks like below
import { createApp } from 'vue'
import App from './App.vue'
import 'bootstrap/dist/css/bootstrap.css'

createApp(App).mount('#app')
Create UI for TODO
First let’s create a file inside the component TodoList.vue
Inside template, we can do small HTML to show todo list
<template>
  <div class="hello">
    <section class="vh-100" style="background-color: #eee">
      <div class="container py-5 h-100">
        <div class="row d-flex justify-content-center align-items-center h-100">
          <div class="col col-lg-9 col-xl-7">
            <div class="card rounded-3">
              <div class="card-body p-4">
                <table class="table mb-4">
                  <thead>
                    <tr>
                      <th scope="col">No.</th>
                      <th scope="col">Todo item</th>
                      <th scope="col">Status</th>
                      <th scope="col">Actions</th>
                    </tr>
                  </thead>

                  <tbody data-v-3de47834="">
                    <tr class="" data-v-3de47834="">
                      <th scope="row" data-v-3de47834="">1</th>
                      <td data-v-3de47834="">Buy groceries for next week</td>
                      <td data-v-3de47834="">In progress</td>
                      <td data-v-3de47834="">
                        <button
                          type="submit"
                          class="btn btn-danger"
                          data-v-3de47834=""
                        >
                          Delete</button
                        ><button
                          type="submit"
                          class="btn btn-success ms-1"
                          data-v-3de47834=""
                        >
                          Complete
                        </button>
                      </td>
                    </tr>
                    <tr class="" data-v-3de47834="">
                      <th scope="row" data-v-3de47834="">2</th>
                      <td data-v-3de47834="">Pay credit card bill</td>
                      <td data-v-3de47834="">In progress</td>
                      <td data-v-3de47834="">
                        <button
                          type="submit"
                          class="btn btn-danger"
                          data-v-3de47834=""
                        >
                          Delete</button
                        ><button
                          type="submit"
                          class="btn btn-success ms-1"
                          data-v-3de47834=""
                        >
                          Complete
                        </button>
                      </td>
                    </tr>
                  </tbody>
                </table>
              </div>
            </div>
          </div>
        </div>
      </div>
    </section>
  </div>
</template>

<script>

</script>

<!-- Add "scoped" attribute to limit CSS to this component only -->
<style scoped>
h3 {
  margin: 40px 0 0;
}
ul {
  list-style-type: none;
  padding: 0;
}
li {
  display: inline-block;
  margin: 0 10px;
}
a {
  color: #37dd92;
}
a.link {
  color: #3771dd;
}
.stricked {
  text-decoration: line-through;
}
</style>
Create composable function
Now we can create a new folder composable inside src (we can use clean code and write in separate composable function )
In composible/useTodoList.js we can add some basic TodosList
import { reactive } from "vue";
function useTodoList() {
  let state = reactive({

    todos: [
      {
        id: 1,
        title: "Buy groceries for next week",
        completed: false,
      },
      {
        id: 2,
        title: "Pay credit card bill ",
        completed: false,
      },
    ],
  });


  return {
    state,
  };
}

export default useTodoList
Now we can import useTodoList in TodoList.vue and tweak some code
<template>
 ...

                  <tbody>
                    <tr
                      v-for="(todo, idx) in state.todos"
                      :key="todo.id"
                      :class="todo.completed && 'stricked'"
                    >
                      <th scope="row">{{ idx + 1 }}</th>
                      <td>{{ todo.title }}</td>
                      <td>
                        {{ todo.completed ? "Completed" : "In progress" }}
                      </td>
                      <td>
                        <button
                          type="submit"
                          class="btn btn-danger"
                          @click="removeItem(todo)"
                        >
                          Delete
                        </button>
                        <button
                          type="submit"
                          class="btn btn-success ms-1"
                          @click="toggleCompleted(todo)"
                        >
                          {{ todo.completed ? "Re-open" : "Complete" }}
                        </button>
                      </td>
                    </tr>
                  </tbody>
             ...
</template>

<script>
import useTodoList from "@/composable/useTodoList";
export default {
  setup() {
    const { state } = useTodoList();
    return {
      state,
    };
  },
};
</script>
...
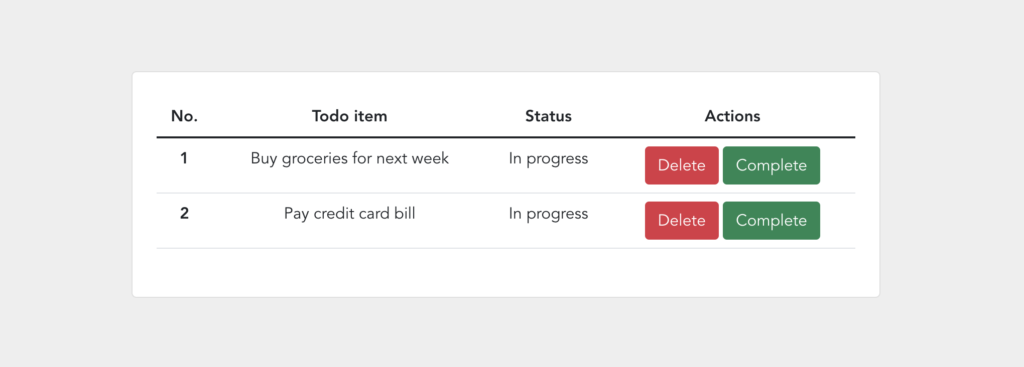
Let us try to run the server
npm run serveAccess http://localhost:8080/ and we can see our code is running 🙂
Add todo
Let us add some input fields to add a todo to list
in TodoList.vue
<form
                  class="row row-cols-lg-auto g-3 justify-content-center align-items-center mb-4 pb-2"
                  @submit.prevent="addToDo"
                >
                  <div class="col-12">
                    <div class="form-outline">
                      <input
                        type="text"
                        id="form1"
                        v-model="state.newTodo"
                        class="form-control"
                        placeholder="Enter a task here"
                      />
                    </div>
                  </div>

                  <div class="col-12">
                    <button
                      type="button"
                      class="btn btn-primary"
                      @click="addToDo"
                    >
                      Save
                    </button>
                  </div>
                </form>
...
<script>
...
  setup() {
    const { state, addToDo } =
      useTodoList();
    return {
      state,
      addToDo,

    };
};
...
</script>
In useTodoList.js we can add new methode and export
...
function addToDo(e) {
e.preventDefault();
state.todos.push({
id: state.todos.length + 1,
title: state.newTodo,
completed: false,
});
state.newTodo = "";
}
...
return {
state,
addToDo,
};
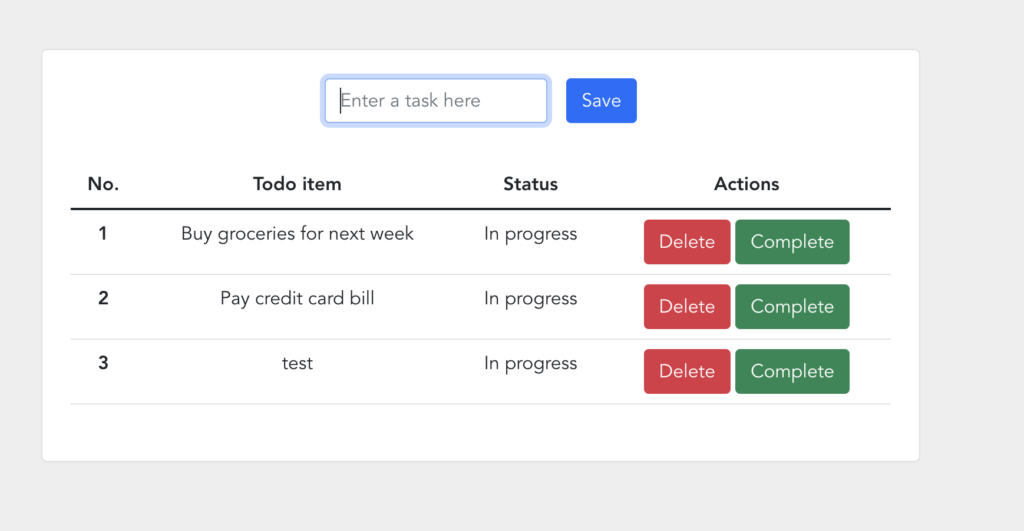
...We have a save function now, after typing on click of saving we call addToDo and push data into our todos object. and the table will re-render and show a new to-do items.
The same way we can add more functionality like removeItem (delete a todo item on click of delete button), toggleCompleted (toggle as completed and in progress) and addTodoForme (adding sample data )
Final code
final code in component/TodoList.vue
<template>
  <div class="hello">
    <section class="vh-100" style="background-color: #eee">
      <div class="container py-5 h-100">
        <div class="row d-flex justify-content-center align-items-center h-100">
          <div class="col col-lg-9 col-xl-7">
            <div class="card rounded-3">
              <div class="card-body p-4">
                <div>
                  <a
                    href="http://shabeebk.com/blog/simple-vue-composition-api-example-with-todo-app/"
                    target="_sb"
                    class="link"
                    >Read Full Blog
                  </a>
                </div>
                <h4 class="text-center my-3 pb-3">
                  Vue 3 with composition-api To Do App
                </h4>

                <form
                  class="row row-cols-lg-auto g-3 justify-content-center align-items-center mb-4 pb-2"
                  @submit.prevent="addToDo"
                >
                  <div class="col-12">
                    <div class="form-outline">
                      <input
                        type="text"
                        id="form1"
                        v-model="state.newTodo"
                        class="form-control"
                        placeholder="Enter a task here"
                      />
                    </div>
                  </div>

                  <div class="col-12">
                    <button
                      type="button"
                      class="btn btn-primary"
                      @click="addToDo"
                    >
                      Save
                    </button>
                  </div>

                  <div class="col-12">
                    <button
                      type="button"
                      class="btn btn-warning"
                      @click="addTodoForme"
                    >
                      Add sample
                    </button>
                  </div>
                </form>

                <table class="table mb-4">
                  <thead>
                    <tr>
                      <th scope="col">No.</th>
                      <th scope="col">Todo item</th>
                      <th scope="col">Status</th>
                      <th scope="col">Actions</th>
                    </tr>
                  </thead>

                  <tbody>
                    <tr
                      v-for="(todo, idx) in state.todos"
                      :key="todo.id"
                      :class="todo.completed && 'stricked'"
                    >
                      <th scope="row">{{ idx + 1 }}</th>
                      <td>{{ todo.title }}</td>
                      <td>
                        {{ todo.completed ? "Completed" : "In progress" }}
                      </td>
                      <td>
                        <button
                          type="submit"
                          class="btn btn-danger"
                          @click="removeItem(todo)"
                        >
                          Delete
                        </button>
                        <button
                          type="submit"
                          class="btn btn-success ms-1"
                          @click="toggleCompleted(todo)"
                        >
                          {{ todo.completed ? "Re-open" : "Complete" }}
                        </button>
                      </td>
                    </tr>
                  </tbody>
                </table>
              </div>
            </div>
          </div>
        </div>
      </div>
    </section>
  </div>
</template>

<script>
import useTodoList from "@/composable/useTodoList";
export default {
  setup() {
    const { state, addToDo, toggleCompleted, removeItem, addTodoForme } =
      useTodoList();
    return {
      state,
      addToDo,
      toggleCompleted,
      removeItem,
      addTodoForme,
    };
  },
};
</script>

<!-- Add "scoped" attribute to limit CSS to this component only -->
<style scoped>
h3 {
  margin: 40px 0 0;
}
ul {
  list-style-type: none;
  padding: 0;
}
li {
  display: inline-block;
  margin: 0 10px;
}
a {
  color: #37dd92;
}
a.link {
  color: #3771dd;
}
.stricked {
  text-decoration: line-through;
}
</style>
In composable/useTodoList.js
import { reactive } from "vue";
function useTodoList() {
  let state = reactive({
    newTodo: "",
    todos: [
      {
        id: 1,
        title: "Buy groceries for next week",
        completed: false,
      },
      {
        id: 2,
        title: "Pay credit card bill ",
        completed: false,
      },
    ],
  });

  function addToDo(e) {
    e.preventDefault();
    state.todos.push({
      id: state.todos.length + 1,
      title: state.newTodo,
      completed: false,
    });
    state.newTodo = "";
  }

  function toggleCompleted(item) {
    item.completed = !item.completed;
  }
  function removeItem(item) {
    state.todos = state.todos.filter((newItem) => newItem.id !== item.id);
  }
  function addTodoForme(e) {
    e.preventDefault();
    const text = `New to do list item with id ${state.todos.length + 1}`;
    state.todos.push({
      id: state.todos.length + 1,
      title: text,
      completed: false,
    });
  }
  return {
    state,
    addToDo,
    toggleCompleted,
    removeItem,
    addTodoForme,
  };
}

export default useTodoList;
And final output

Conclusion
Finally, we’ve built our app with Vue 3 Composition API.
I hope you learned a few things about Vue 3 and Composition API, Let me know if you have any comments
You can download the full source code from my GitHub repo
Demo link: https://vue3-composition-api.pages.dev/
2,466 total views, 1 views today