I have been working with Vue for a long time, Sometimes I have to create vue project as a library, and I have to use it in multiple projects, Here I am explaining how to create a small Vue js (vue 2) component library, push to npm and use in our project
we are going to create two Vue.js apps:
- A library or package that will contain a basic component
- An app that will use the just created library
Prerequisites
I’m going to use npm as the package manager and vueCLI to create and build both our library and app.
Project Setup
I created a blog to set up a Vue js project in my previous article briefly, please refer here. Here I am pasting all the comments I used.
APP setup
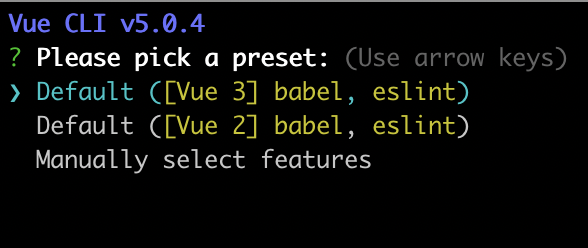
Let’s create our app first
vue create vue-app
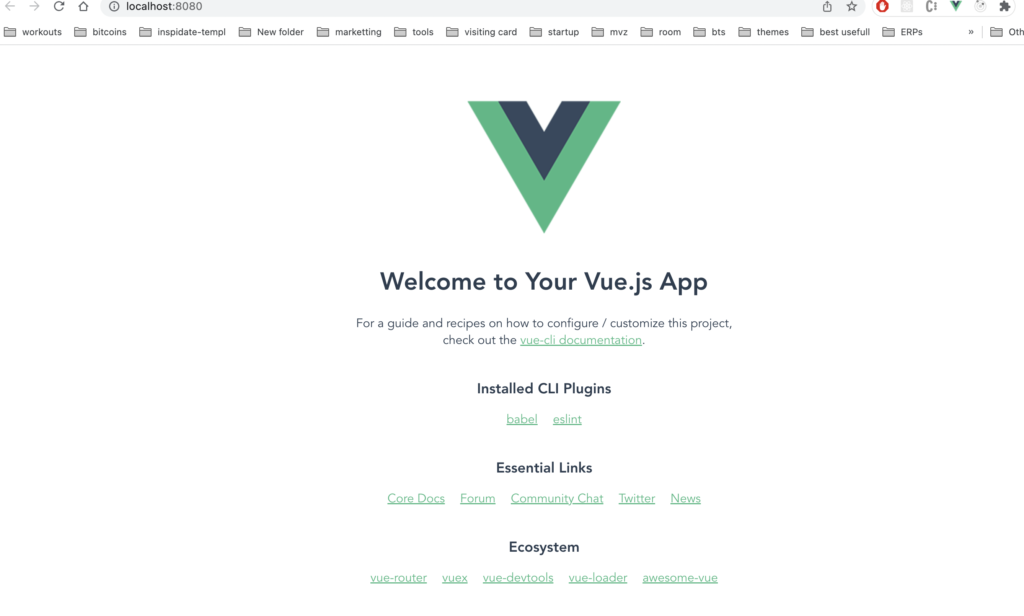
Then we can cd vue-app and npm run serve to run the server.
This will run our server in http://localhost:8080/
Library setup
Let’s create a basic project for the library now
vue create sb-vue-component-library
Then we can cd vue-app and npm run serve to run the server
This will run our server in http://localhost:8081/ (since our app is running on 8080)
Now let’s create a button component and add functionality
Lets us remove component/Helloworld.vue and create a new file component/Button.vue
<template>
  <div>
    <button @click="incrementCount" class="simple-button">{{ text }}</button>
  </div>
</template>

<script>
export default {
  name: "myButton",
  data() {
    return {
      buttonCount: 0,
    };
  },
  computed: {
    times() {
      return this.buttonCount > 1 ? "times" : "time";
    },
    text() {
      return `Button clicked ${this.buttonCount} ${this.times}`;
    },
  },
  methods: {
    incrementCount() {
      this.buttonCount += 1;
    },
  },
};
</script>

<!-- Add "scoped" attribute to limit CSS to this component only -->
<style scoped>
.simple-button {
  background: #1966c0;
  color: white;
  min-height: 30px;
  padding: 10px 20px;
  font-size: 18px;
  font-weight: 600;
}
</style>
Letus creat a index.js inside component and export above component from there.
This will help us when we are adding more component and use as library
component/index.js
import Button from "./Button.vue";
export default { Button };
In App.vue, we remove Helloworld and import our button component
<template>
<div id="app">
<Button />
</div>
</template>
<script>
import Button from "./components/Button.vue";
export default {
name: "App",
components: {
Button,
},
};
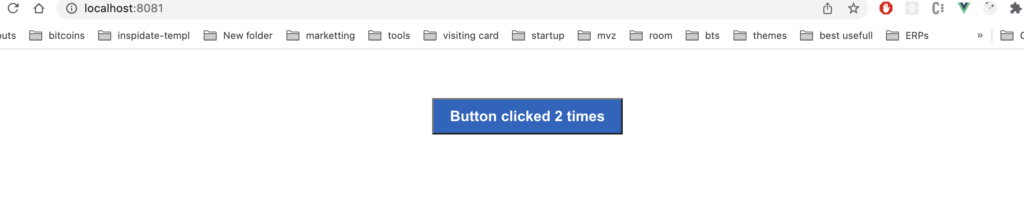
</script>We can run the server and it will look like below. Every time you click on the button the text should update.
Library Build
Let’s make a new file lib-setup.js in src
import OurVue from "vue";
import components from "./components";
// import Button from "@/components/Button";

/**
 * install function
 *
 * @param {*} Vue parent component vue contructor
 */
function install(Vue) {
  if (OurVue !== Vue) {
    // eslint-disable-next-line no-console
    console.error("Multiple instances of Vue detected ");
  }

  if (install.installed) return;
  install.installed = true;

  // registering component to use as  plugin
  //   if we need to use a single component only use below line only
  //   Vue.component("my-button", Button);
  for (const prop in components) {
    // eslint-disable-next-line no-prototype-builtins
    if (components.hasOwnProperty(prop)) {
      const component = components[prop];
      Vue.component(component.name, component);
    }
  }
}

const plugin = {
  install,
};

let GlobalVue = null;
if (typeof window !== "undefined") {
  GlobalVue = window.Vue;
} else if (typeof global !== "undefined") {
  GlobalVue = global.vue;
}

if (GlobalVue) {
  GlobalVue.use(plugin);
}

plugin.install = install;

export default plugin;
In the above code, we are saying to register all the components in component/index.js as individual components with defined names in the component file.
If we need only one file to export as a library we can do as below (commented code in above code section)
import myButton from "@/components/myButton";define the name (here I am giving “my-button” as the name of the component) as below.
Vue.component("my-button", Button);Update package with a build script
in package.json, we can add one more line to build our library using lib-setup.js the file. So we can add the below line
"build:lib": "vue-cli-service build --name lib --target lib --dest dist src/lib-setup.js"Let us add Vue 2 in peerDependencies, so npm will warn if the version is not matching
"peerDependencies": {
    "vue": "^2.6.14"
  },
Now let’s build our library, by typing in the comment line
npm run build:libThe output of the build process will create a folder dist and 4 files inside, let’s see what are those:
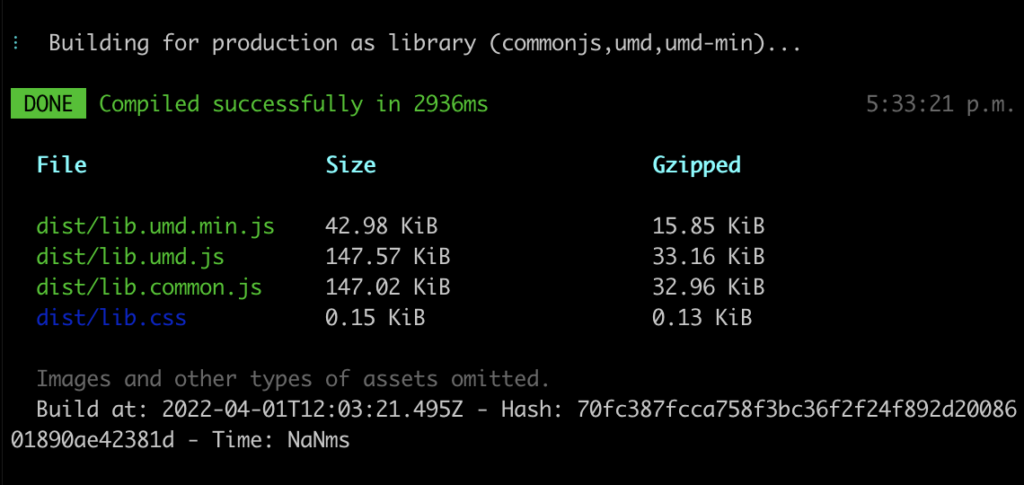
- dist/lib.umd.js: UMD (Universal Module Definition) bundle can be consumed directly in the browser as a module.
dist/lib.umd.min.js:minified UMD bundle.dist/lib.common.js:CommonJS bundle which can be consumed by other bundlers, this file will be used as an entry point.- dist/lib.css: CSS file which was extracted from the components.
Now, we want to add the entry point to our library, we will add it to package.json:
"main": "./dist/lib.umd.min.js",After that, we want to whitelist the files which will be included in our npm package, add this to package.json: (Here we need to add only compiled files in the package)
"files": [ "dist/*"],
final library packages.json
{
  "name": "sb-vue-component-library",
  "version": "0.1.0",
  "private": false,
  "license": "MIT",
  "author": {
    "name" : "Shabeeb K",
    "email" : "mail@shabeebk.com",
    "url" : "http://shabeebk.com/"
  },
  "main": "./dist/lib.umd.min.js",
  "files": [ "dist/*"],
  "scripts": {
    "serve": "vue-cli-service serve",
    "build": "vue-cli-service build",
    "lint": "vue-cli-service lint",
    "build:lib": "vue-cli-service build --name lib --target lib --dest dist src/lib-setup.js"
  },
  "dependencies": {
    "core-js": "^3.8.3",
    "vue": "^2.6.14"
  },
  "devDependencies": {
    "@babel/core": "^7.12.16",
    "@babel/eslint-parser": "^7.12.16",
    "@vue/cli-plugin-babel": "~5.0.0",
    "@vue/cli-plugin-eslint": "~5.0.0",
    "@vue/cli-service": "~5.0.0",
    "eslint": "^7.32.0",
    "eslint-plugin-vue": "^8.0.3",
    "vue-template-compiler": "^2.6.14"
  },
  "peerDependencies": {
    "vue": "^2.6.14"
  },
  "eslintConfig": {
    "root": true,
    "env": {
      "node": true
    },
    "extends": [
      "plugin:vue/essential",
      "eslint:recommended"
    ],
    "parserOptions": {
      "parser": "@babel/eslint-parser"
    },
    "rules": {}
  },
  "browserslist": [
    "> 1%",
    "last 2 versions",
    "not dead"
  ]
}
How to import library
Now you can use the npm package as a dependency in your other projects.
There are multiple ways to use this library in our project.
1. Using the npm link
We can consume the library locally by configuring the npm link or can just publish it to npm and install it in your project.
npm linkThis will create a global symbolic link to the package. Do you remember we created another sample project to use this library, which is running in http://localhost:8080/? Inside that project we can run the below the vue-app
npm link sb-vue-component-library2. Using Github
We can push our code to GitHub and install the plugin directly from Github. To do so,
We have to build our library and commit dist folder.
I removed /dist from .gitignore file and commit all changes to Github.
Now our vue-app
npm i https://github.com/shabeeb/sb-vue-component-library.git --save3. publishing to npm
Please refer to part 2 of this blog to publish to npm, here
once it is published, we can use
npm i sb-vue-component-library --saveHow to use the library
Now we have our sb-vue-component-library in our package.json and inside our node_modules. Let’s use it
since our folder name is different from the package name (I changed it since the name is not available in npmjs) we use the package name here.
in main.js
import myButton from "sb-vue-component-library";Let’s import CSS also for styles
import "sb-vue-component-library/dist/lib.css";and we can use it globally
Vue.use(myButton);Final main.js code looks like
import Vue from "vue";
import App from "./App.vue";
import myButton from "sb-vue-component-library";
import "sb-vue-component-library/dist/lib.css";

Vue.config.productionTip = false;
Vue.use(myButton);

new Vue({
  render: (h) => h(App),
}).$mount("#app");
We can use it in our App.vue
<my-button />Final App.vue
<template>
  <div id="app">
    <img alt="Vue logo" src="./assets/logo.png" />
    <my-button />
  </div>
</template>

<script>
export default {
  name: "App",
};
</script>
Conclusion
We created a button as a library and we used it on our sample project. This can be used in multiple projects and save a lot of development time.
You can find the GitHub repos here:
library: https://github.com/shabeeb/sb-vue-component-library
project: https://github.com/shabeeb/vue-library-app
Demo: https://vue-library-app.pages.dev/
3,305 total views, 2 views today